Estimated reading time: 11 minutes
AWS Glue is a serverless ETL (Extract, transform, and load) service on the AWS cloud. It makes it easy for customers to prepare their data for analytics. In this article, I will briefly touch upon the basics of AWS Glue and other AWS services.
I will then cover how we can extract and transform CSV files from Amazon S3. We will also look at how these CSVs convert into a data catalog and query them using Amazon Athena without the need for any EC2 instance or server. Towards the end, we will load the transformed data into Amazon Redshift that can later be used for analysis.
Components of AWS Glue
- Data catalog: The data catalog holds the metadata and the structure of the data.
- Database: It is used to create or access the database for the sources and targets.
- Table: Create one or more tables in the database that can be used by the source and target.
- Crawler and Classifier: A crawler is used to retrieve data from the source using built-in or custom classifiers. It creates/uses metadata tables that are pre-defined in the data catalog.
- Job: A job is business logic that carries out an ETL task. Internally, Apache Spark with python or scala language writes this business logic.
- Trigger: A trigger starts the ETL job execution on-demand or at a specific time.
- Development endpoint: It creates a development environment where the ETL job script can be tested, developed and debugged.
End-to-End ETL on AWS Glue
This tutorial helps you understand how AWS Glue works along with Amazon S3 and Amazon Redshift. This practical guide will show how to read data from different sources (we will cover Amazon S3 in this guide) and apply some must required data transformations such as joins and filtering on the tables and finally load the transformed data in Amazon Redshift.
A JDBC connection connects data sources and targets using Amazon S3, Amazon RDS, Amazon Redshift or any external database.
Before implementing any ETL job, you need to create an IAM role and upload the data into Amazon S3.
Create an IAM role to access AWS Glue + Amazon S3:
- Open the Amazon IAM console
- Click on Roles in the left pane. Then click on Create Role.
- Choose the AWS service from Select type of trusted entity section
- Choose Glue service from “Choose the service that will use this role” section
- Choose Glue from “Select your use case” section
- Click on Next:Permissions
- Select AWSGlueServiceRole from the Attach Permissions Policies section. AWSGlueServiceRole policy contains permissions to access Glue, CloudWatch, EC2, S3, and IAM
- Click on Next:Tags. Leave the Add tags section blank and click on Next:Review
- Provide a name to identify the service role AWSGlueServiceRole-<role name>(for simplicity add prefix ‘AWSGlueServiceRole-’ in the role name) for the role
- Click on Create role
- Your role with full access to AWS Glue and limited access to Amazon S3 has been created
Upload source CSV files to Amazon S3:
- On the Amazon S3 console, click on the Create a bucket where you can store files and folders.
- Enter a bucket name, select a Region and click on Next
- The remaining configuration settings for creating an S3 bucket are optional. Click Next to create your S3 bucket.
- Create a new folder in your bucket and upload the source CSV files
Create a connection for the target database into Amazon Redshift:
- Prerequisite: You must have an existing cluster, database name and user for the database in Amazon Redshift.
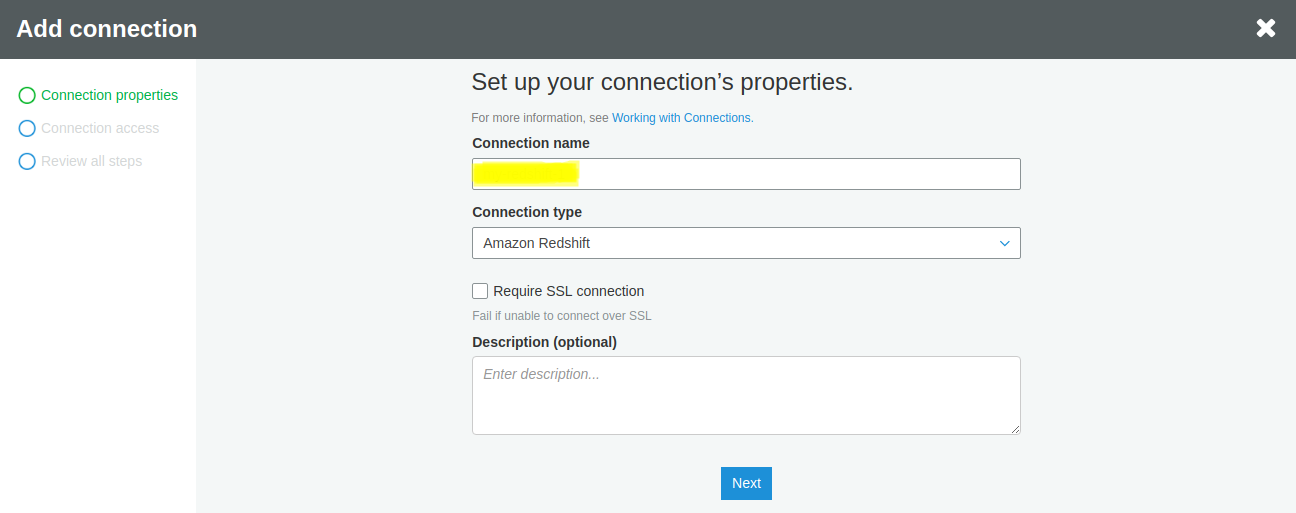
- In the AWS Glue console, click on the Add Connection in the left pane.
In the dialog box, enter the connection name under Connection name and choose the Connection type as Amazon Redshift. Click Next to move to the next screen.
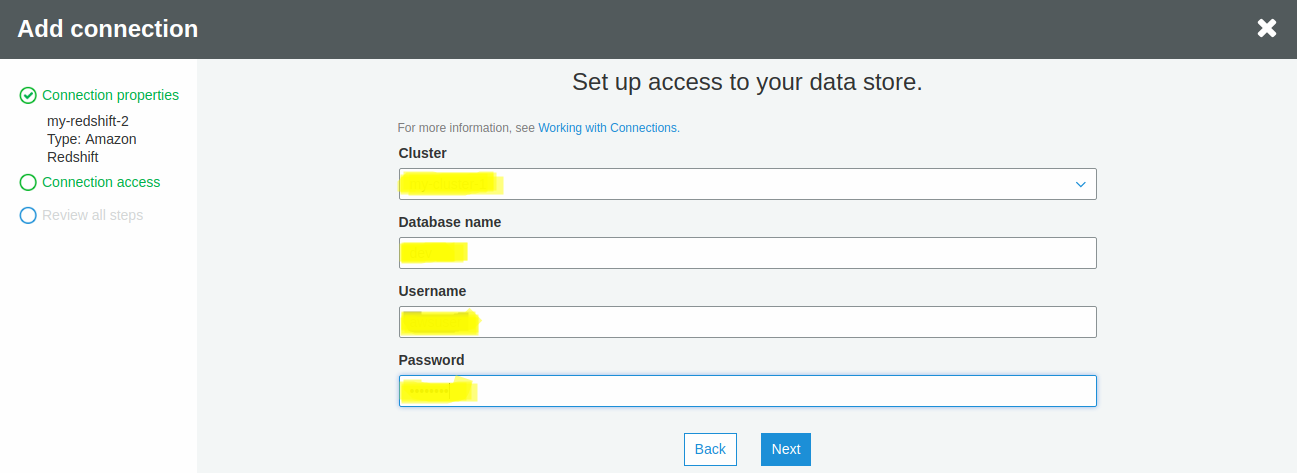
- Select your existing cluster in Amazon Redshift as the cluster for your connection
- Enter the database name, username, and password of the cluster and click Next
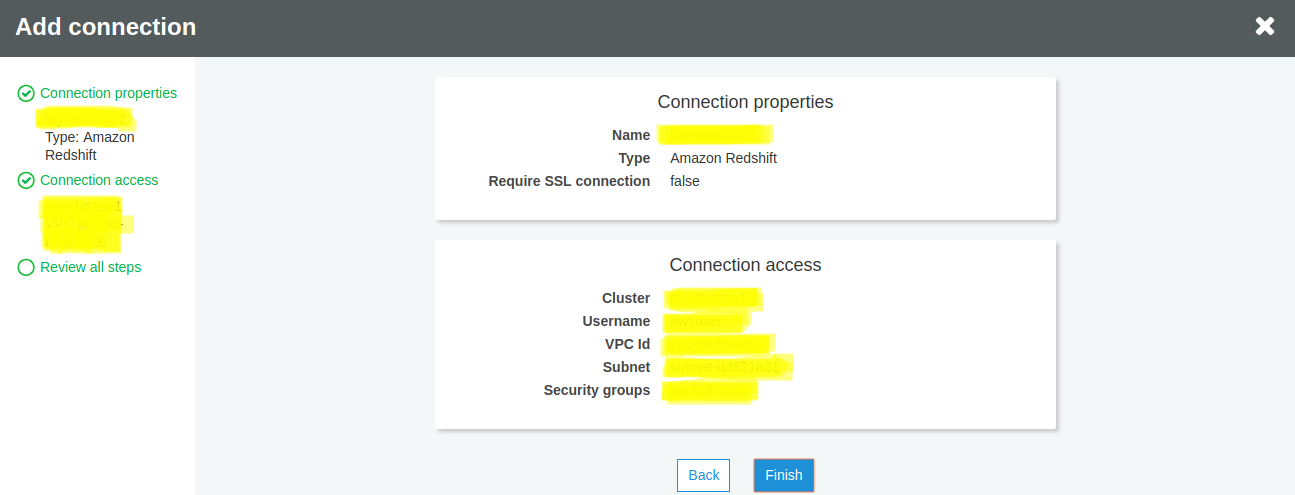
Review the details of the connection and then click FinishYour Amazon Redshift connection is now created and can be verified through the Test Connection.
Adding a crawler to create data catalog using Amazon S3 as a data source
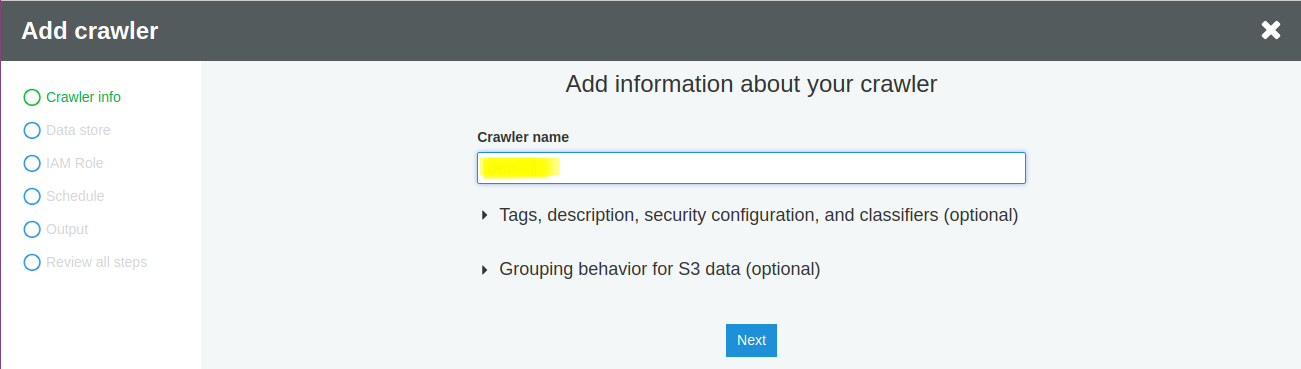
On the left pane in the AWS Glue console, click on Crawlers -> Add Crawler
Enter the crawler name in the dialog box and click Next
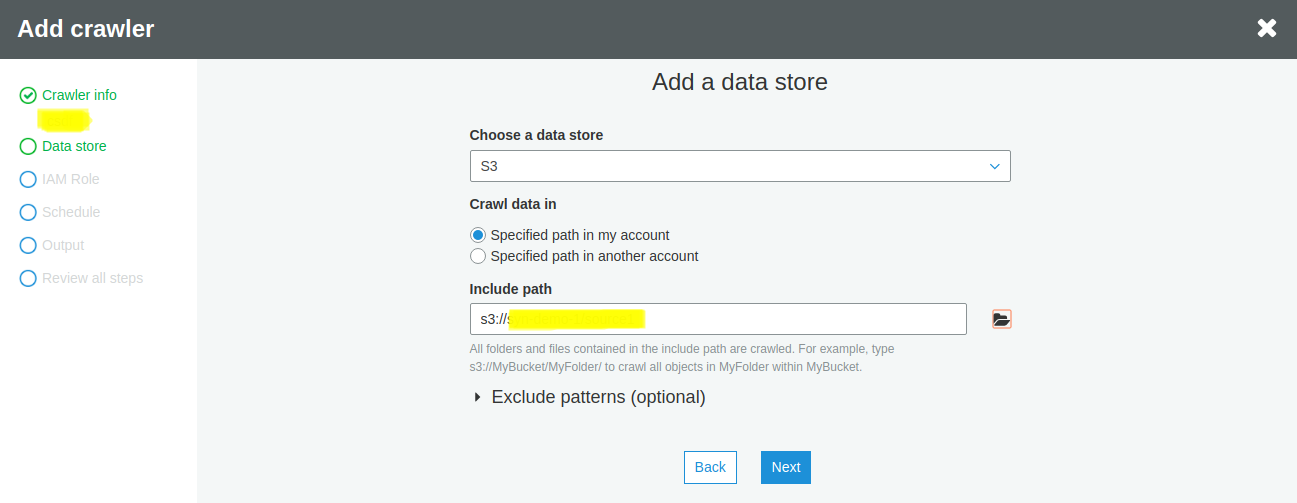
Choose S3 as the data store from the drop-down list
Select the folder where your CSVs are stored in the Include path field
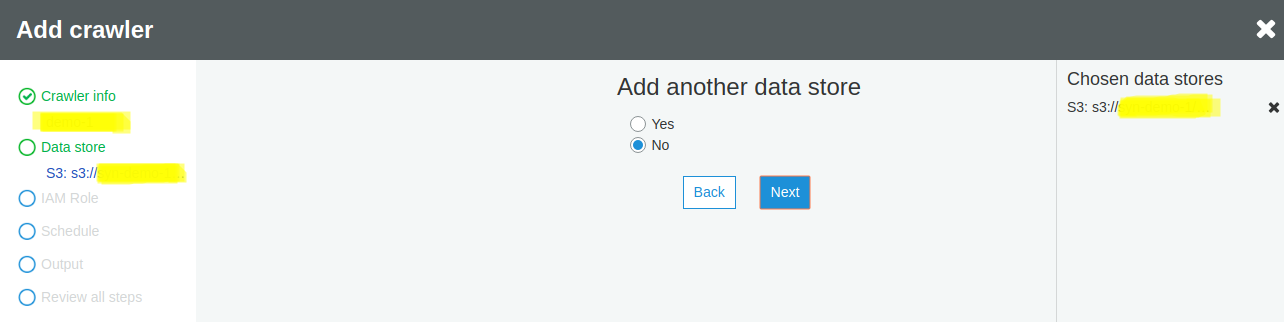
If you have any other data source, click on Yes and repeat the above steps. In this guide, we do not have another example, and we’ll click on No. Then, click Next.
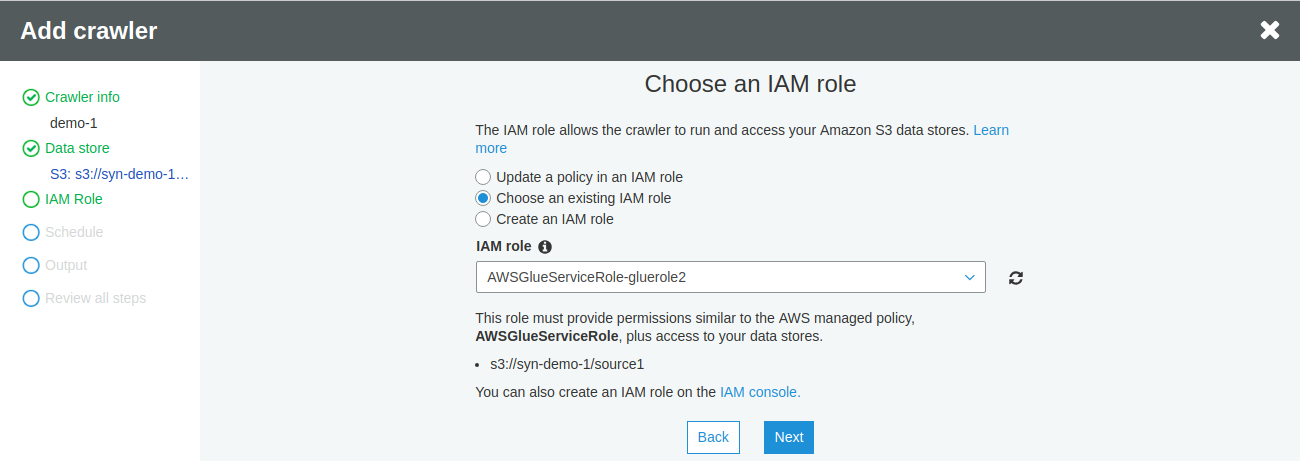
Select Choose an existing IAM role and select the previously created role name from the dropdown list of IAM roles and click Next
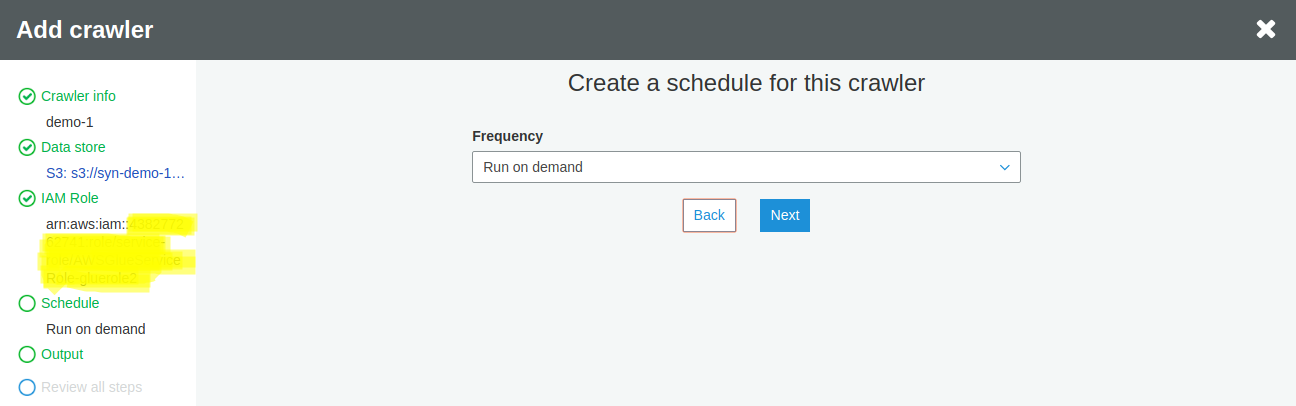
Leave the default option of Run on Demand and click Next
Choose an existing database. If you do not have one, Click Add Database to create a new database on the fly.
Table prefixes are optional and left to the user to customer. The system would also create these automatically after running the crawler. Click Next.

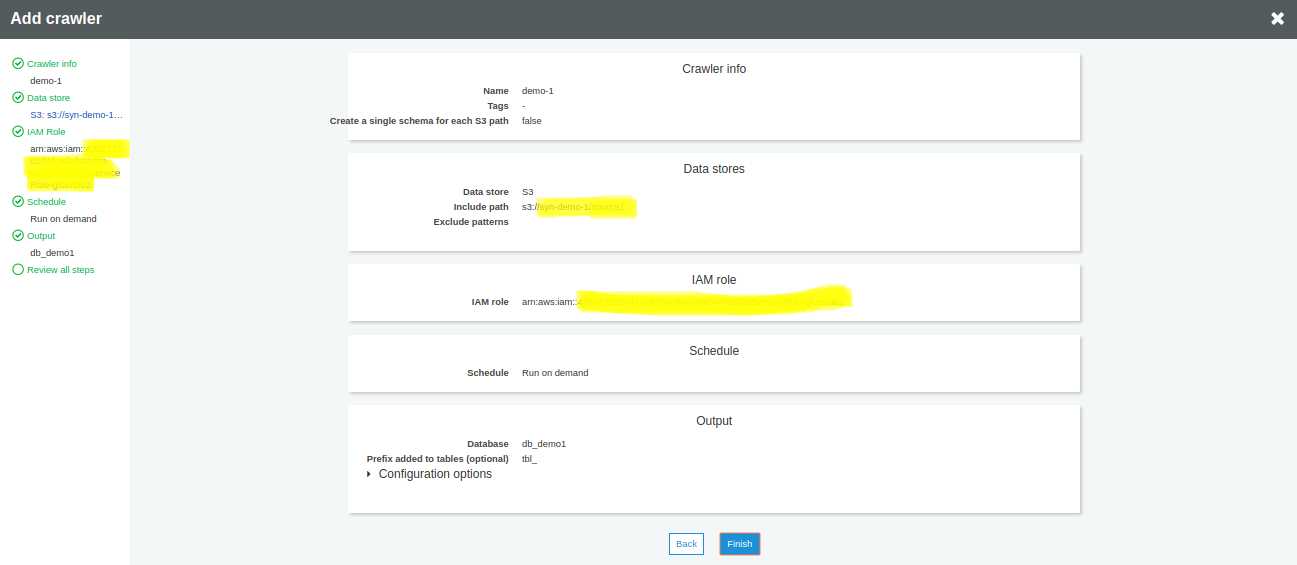
Once you are satisfied with the configuration, click on Finish
You can now run the crawler by clicking Run it now
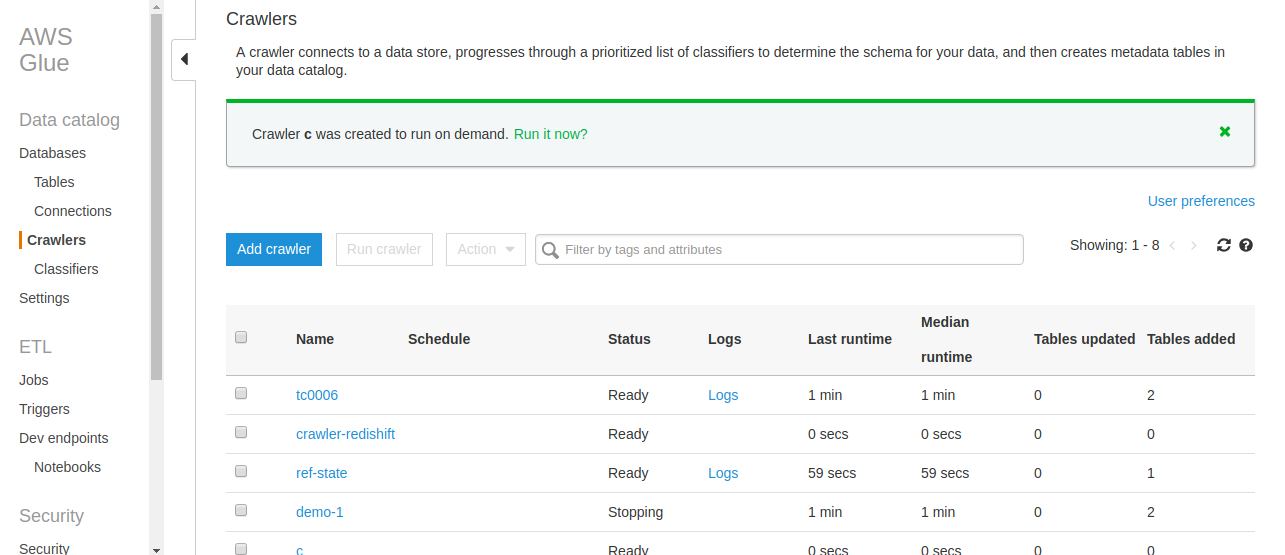
Databases on the left pane let you verify if the tables were created automatically by the crawler. Amazon Athena enables you to view the data in the tables.

Find out more about our Advanced AWS Services!
Add a Job to execute ETL work
In the left pane, Click on Job, then click on Add Job
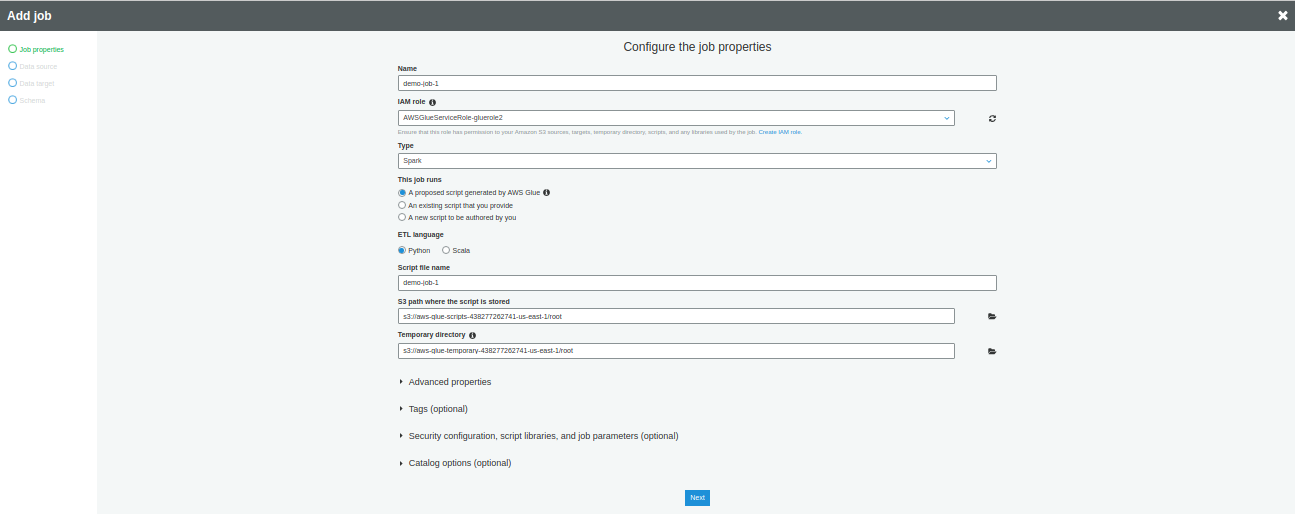
Enter a name for the Job and then select an IAM role previously created for AWS Glue
Select Spark for the Type and select Python or Scala. For our purposes, we are using Python.
You can edit the number of DPU (Data processing unit) value in the Maximum capacity field of Security configuration, script libraries, and job parameters (optional).
The remaining configuration is optional and default values would work fine.
Click Next
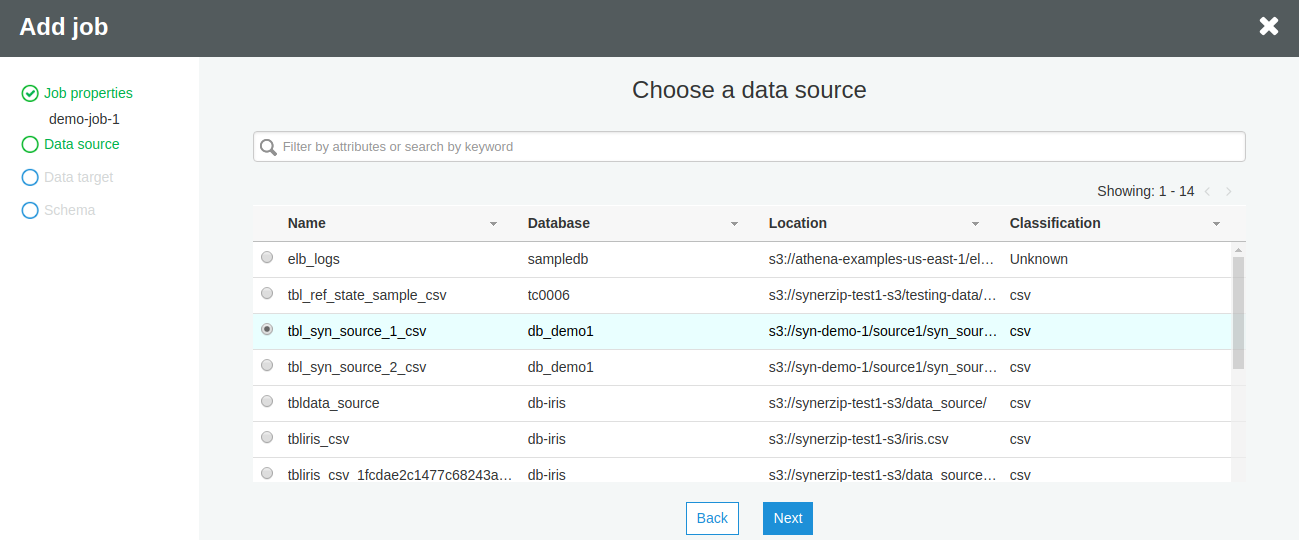
Choose a data source table from Choose a data source section. You can choose only a single data source. Click Next.
Choose a data target table from the list of tables. Either you can create new tables or choose an existing one.
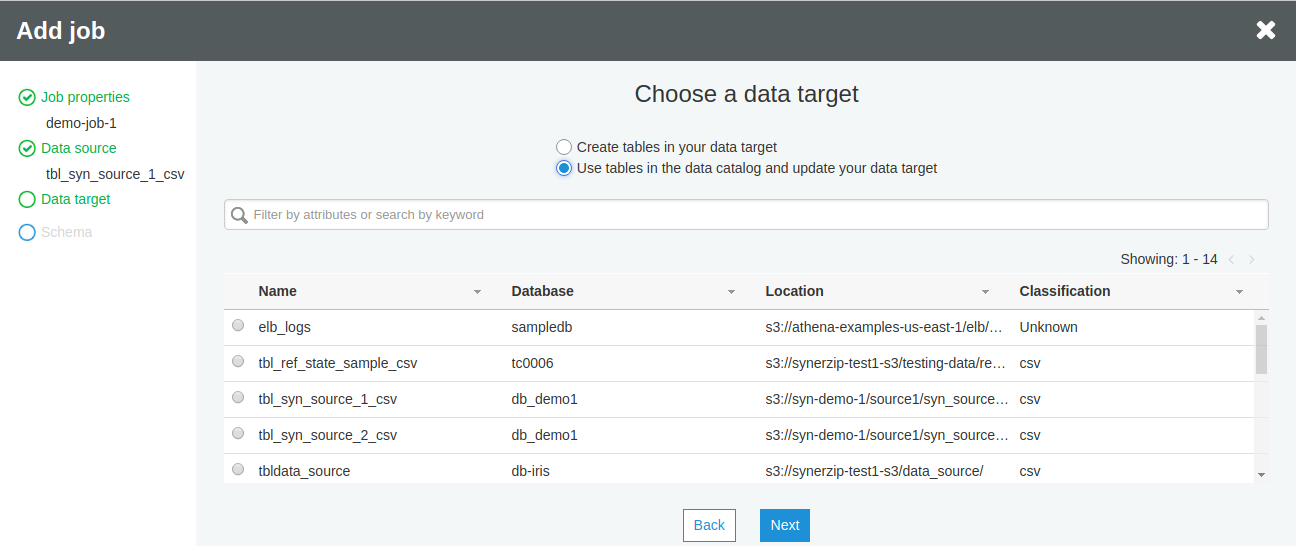
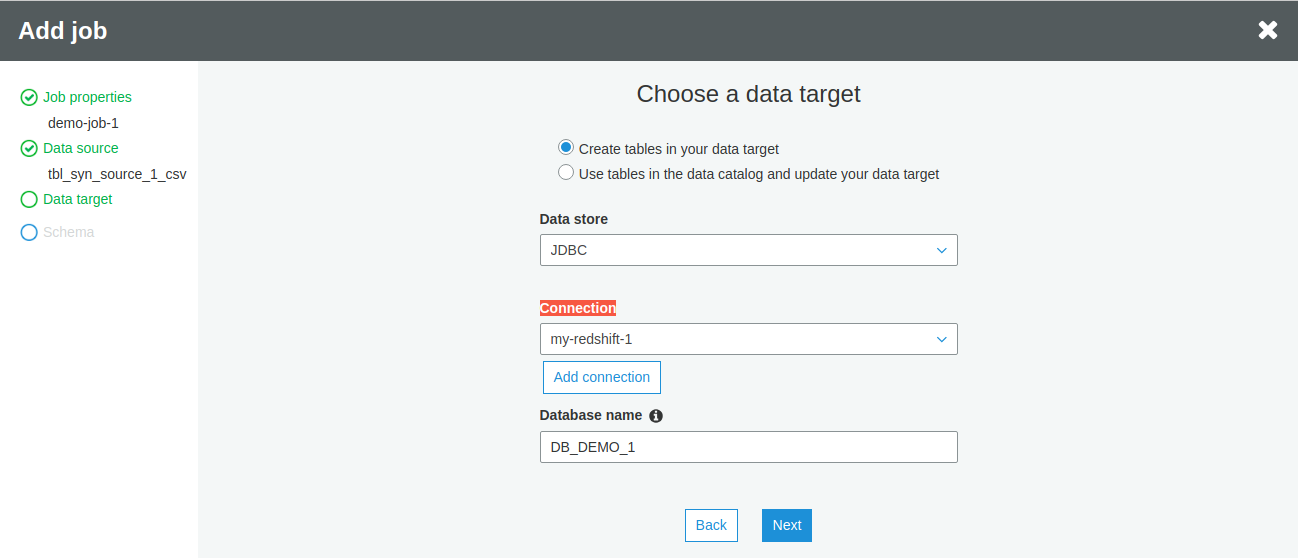
If you haven’t created any target table, select Create tables in your data target option
Our target database is Amazon Redshift and hence we should select JDBC from the dropdown of Datastore and the connection created earlier from the Connection list
Enter a database name that must exist in the target data store. Click Next.
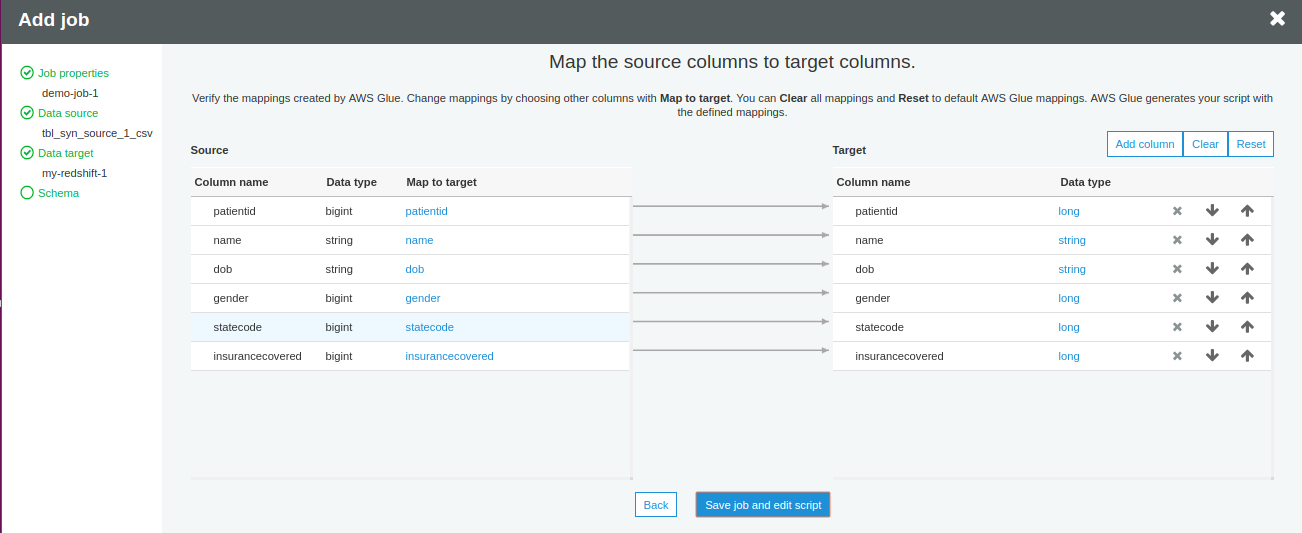
You can map the columns of the source table with those of the target table. For this tutorial, we are going ahead with the default mapping. The business logic can also later modify this.
Click Save job and edit script.
Open the Python script by selecting the recently created job name. Click on Action -> Edit Script.
The left pane shows a visual representation of the ETL process. The right-hand pane shows the script code and just below that you can see the logs of the running Job.
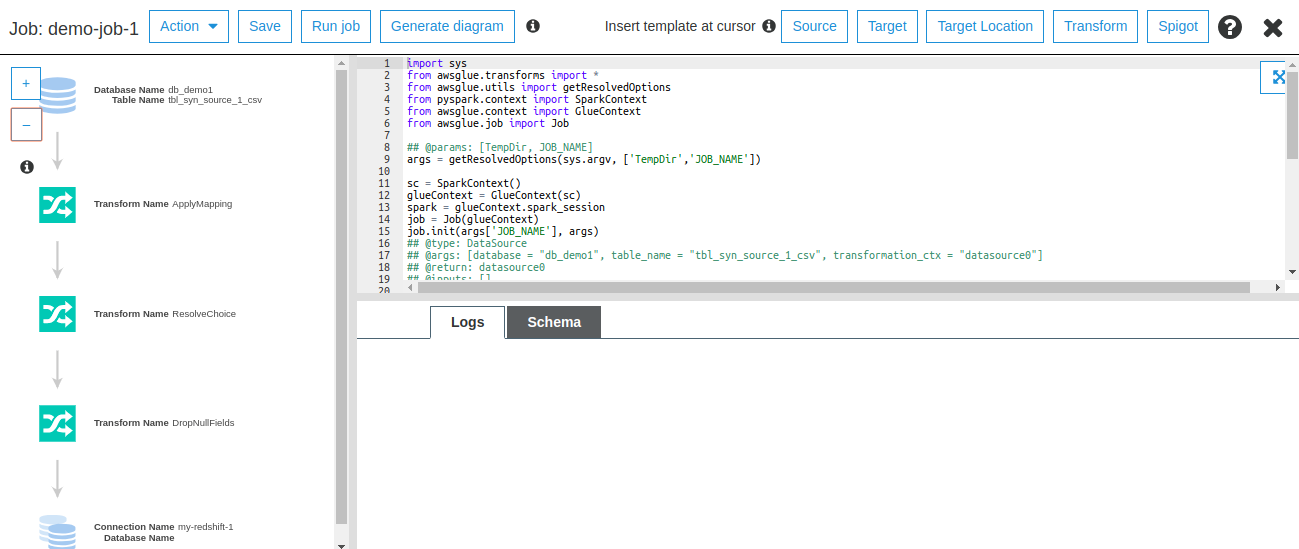
Let’s understand the script that performs extraction, transformation and loading process on AWS Glue.
We begin by Importing the necessary python libraries that create the ETL Job.
import sys
from awsglue.transforms import *
from awsglue.utils import getResolvedOptions
from pyspark.context import SparkContext
from awsglue.context import GlueContext
from awsglue.job import Job
Get the name of Job through the command line.
args = getResolvedOptions(sys.argv, ['TempDir','JOB_NAME'])
Initialize the GlueContext and SparkContext for the Job.
sc = SparkContext()
glueContext = GlueContext(sc)
spark = glueContext.spark_session
job = Job(glueContext)
job.init(args['JOB_NAME'], args)
Extract the data of tbl_syn_source_1_csv and tbl_syn_source_2_csv tables from the data catalog. AWS Glue supports Dynamic Frames of the data.
datasource1 = glueContext.create_dynamic_frame.from_catalog(database = "db_demo1", table_name = "tbl_syn_source_1_csv", transformation_ctx = "datasource1")
datasource2 = glueContext.create_dynamic_frame.from_catalog(database = "db_demo1", table_name = "tbl_syn_source_2_csv", transformation_ctx = "datasource2")
Now, Apply transformation on the source tables. You can join both the tables on statecode column of tbl_syn_source_1_csv and code column of tbl_syn_source_2_csv.
Several transformations are available within AWS Glue such as RenameField, SelectField, Join, etc. Refer – https://docs.aws.amazon.com/glue/latest/dg/built-in-transforms.html.
join1 = Join.apply(frame1 = datasource1, frame2 = datasource2, keys1 = "statecode", keys2 = "code", transformation_ctx = "join1")
Load the joined Dynamic Frame in Amazon Redshift (Database=dev and Schema=shc_demo_1).
datasink1 = glueContext.write_dynamic_frame.from_jdbc_conf(frame = join1, catalog_connection = "my-redshift-1", connection_options = {"dbtable": "sch_demo_1.tbl_joined", "database": "dev"}, redshift_tmp_dir = args["TempDir"], transformation_ctx = "datasink1")
Finally, commit your Job.
job.commit()
Save and execute the Job by clicking on Run Job.
Code Sample
import sys
from awsglue.transforms import *
from awsglue.utils import getResolvedOptions
from pyspark.context import SparkContext
from awsglue.context import GlueContext
from awsglue.job import Job
args = getResolvedOptions(sys.argv, ['TempDir','JOB_NAME'])
## Initialize the GlueContext and SparkContext
sc = SparkContext()
glueContext = GlueContext(sc)
spark = glueContext.spark_session
job = Job(glueContext)
job.init(args['JOB_NAME'], args)
## Read the data from Amazon S3 and have their structure in the data catalog.
datasource1 = glueContext.create_dynamic_frame.from_catalog(database = "db_demo1", table_name = "tbl_syn_source_1_csv", transformation_ctx = "datasource1")
datasource2 = glueContext.create_dynamic_frame.from_catalog(database = "db_demo1", table_name = "tbl_syn_source_2_csv", transformation_ctx = "datasource2")
## Apply transformation, join the tables
join1 = Join.apply(frame1 = datasource1, frame2 = datasource2, keys1 = "statecode", keys2 = "code", transformation_ctx = "join1")
## Write the transformed data into Amazon Redshift
datasink1 = glueContext.write_dynamic_frame.from_jdbc_conf(frame = join1, catalog_connection = "my-redshift-1", connection_options = {"dbtable": "sch_demo_1.tbl_joined", "database": "dev"}, redshift_tmp_dir = args["TempDir"], transformation_ctx = "datasink1")
job.commit()
More on transformation with AWS Glue
AWS Glue has a few limitations on the transformations such as UNION, LEFT JOIN, RIGHT JOIN, etc. To overcome this issue, we can use Spark. Convert Dynamic Frame of AWS Glue to Spark DataFrame and then you can apply Spark functions for various transformations.
Example: Union transformation is not available in AWS Glue. However, you can use spark union() to achieve Union on two tables.
## Convert Glue Dynamic frame to Spark DataFrame
spark_data_frame_1 = glue_dynamic_frame_1.toDF()
spark_data_frame_2 = glue_dynamic_frame_2.toDF()
## Apply UNION Transformation on Spark DataFrame
spark_data_frame_union = spark_data_frame_1.union(spark_data_frame_2).distinct()
## Again, convert Spark DataFrame back to Glue Dynamic Frame
glue_dynamic_frame_union = DynamicFrame.fromDF(spark_data_frame_union, glueContext, "spark_data_frame_union")
Github link for source code: https://gist.github.com/nitinmlvya/ba4626e8ec40dc546119bb14a8349b45