This guide will walk you through the process of connecting a dummy device/dummy IoT thing to the AWS IoT console. Connecting to the AWS IoT platform requires authentication and we will describe the process of creating a thing, attaching certificates and policies to it, and then connecting it to the IoT platform via MQTT.
Connecting a dummy device with the AWS IoT console
- Visit the AWS Management Console and sign in with your AWS credentials.
- After logging in, search and select IoT core via the Find Service section.
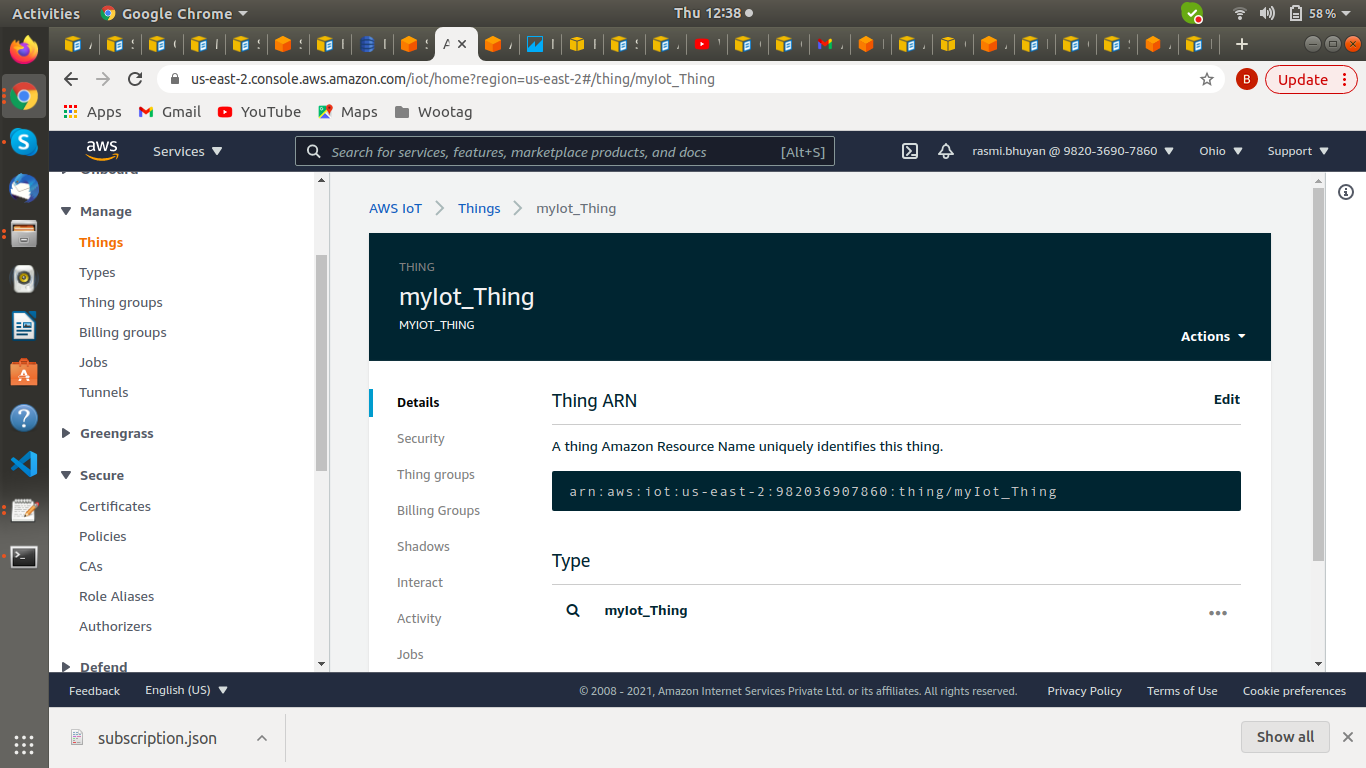
- In the left navigation of the IoT Console follow these set of actions: Manage > Things > Register a thing > Create Single thing.
- Provide a Thing name in the Name section then click Next.
- You then need a certificate for your thing
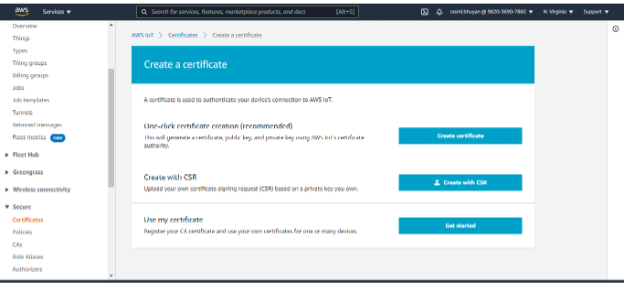
- Click on Create certificate
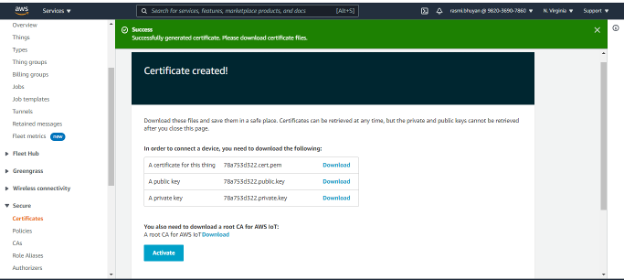
- Download all three certificates along with the root CA for AWS IoT certificate
- Click Activate -> Done
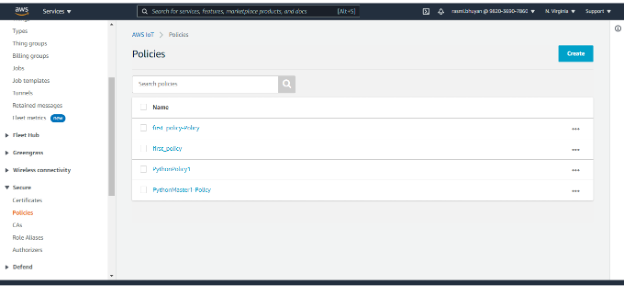
- In the left navigation select Secure -> Policies -> Create.
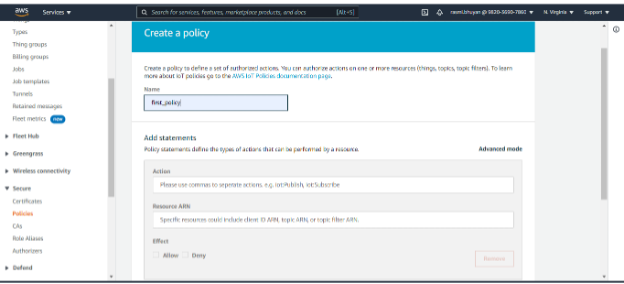
- Provide a Policy Name in the Name Section.
- Add * in the Action section.
- Add * in the Resource ARN section.
- Choose Allow and then Create
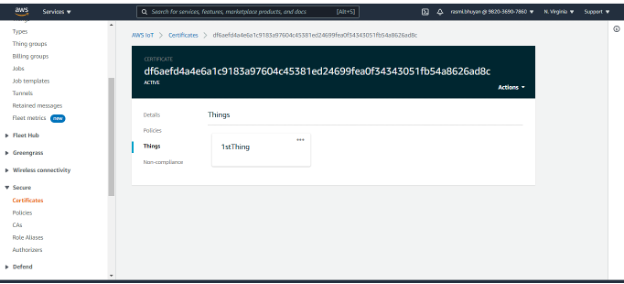
- In the left Navigation click Secure -> Certificate
- Click the ellipsis (…) on the certificate -> Attach policy -> choose your policy ->
- In the left Navigation click Things -> Interact
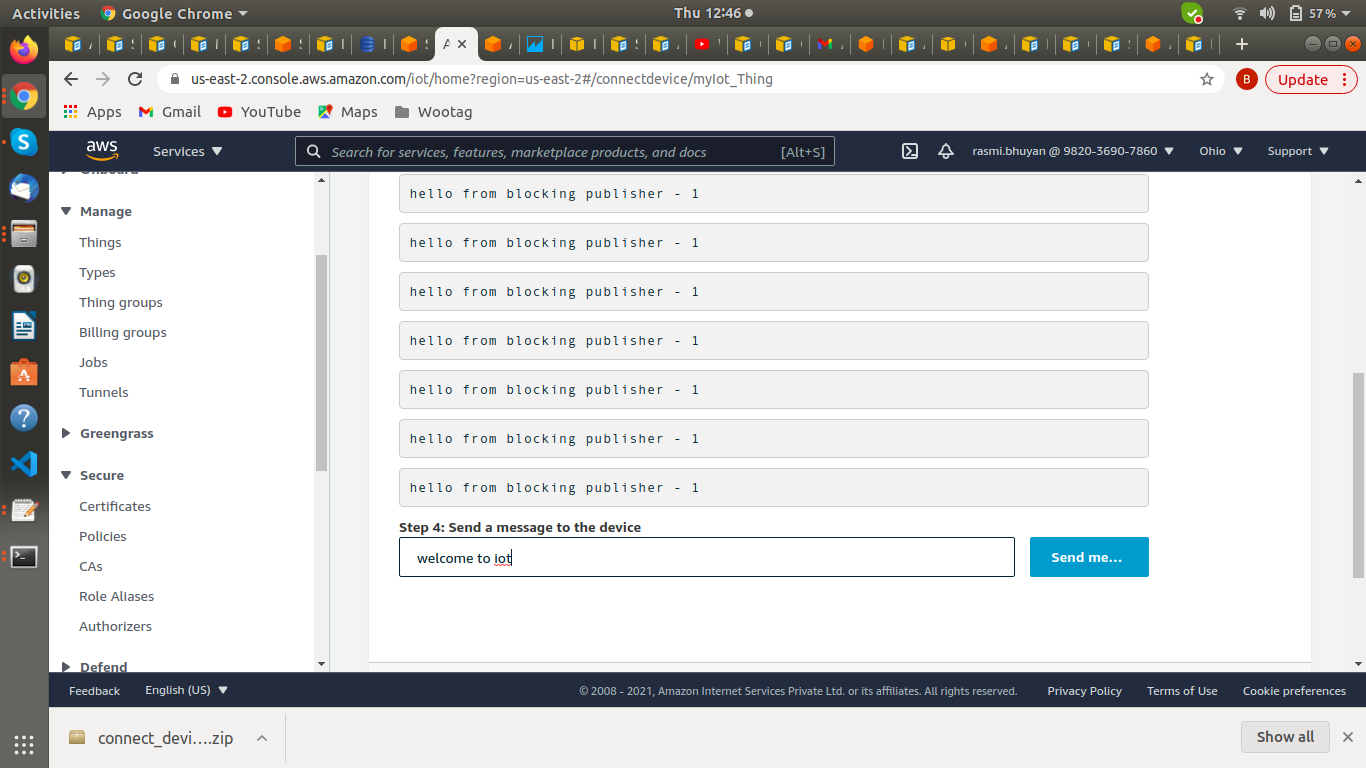
Sending data from the IoT console
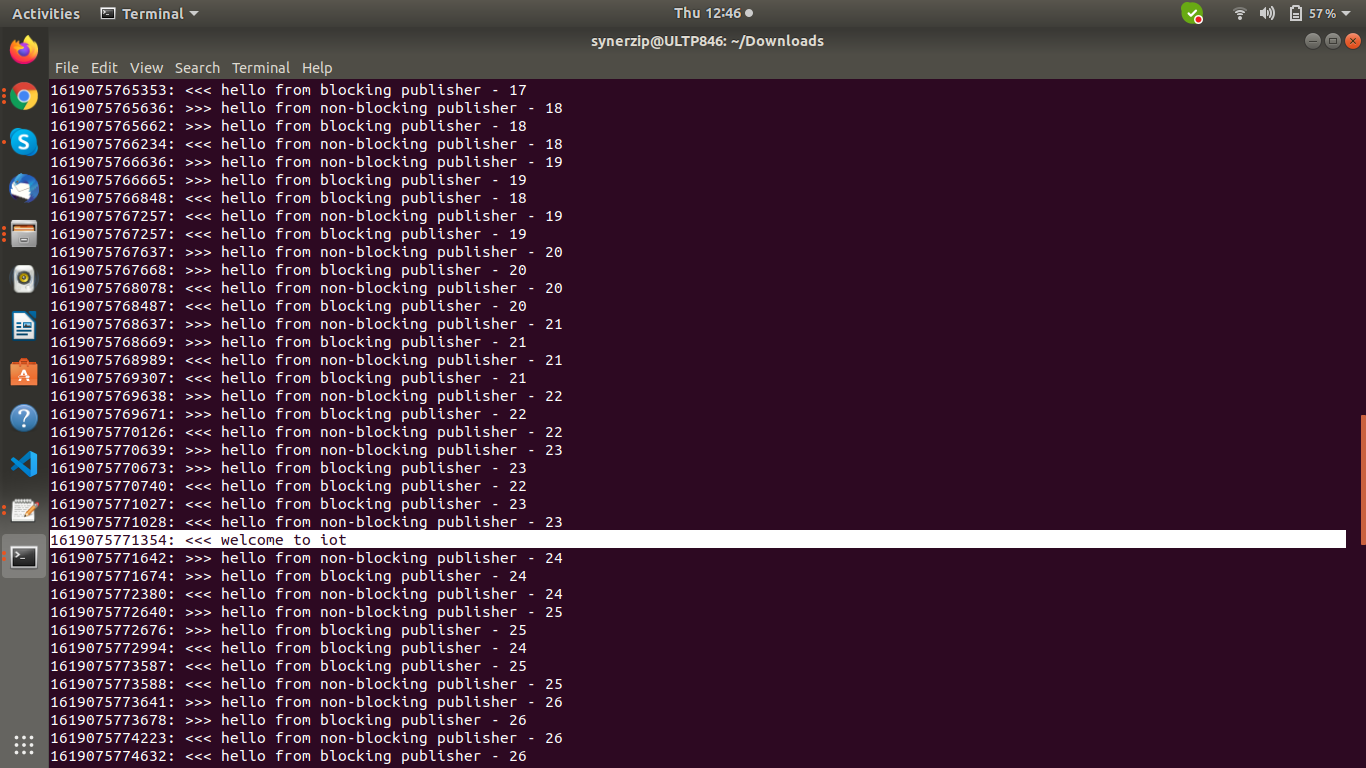
Data displayed in device,
Creating a device and setting up device authentication using a Raspberry Pi and AWS IoT Policy & Certificate
Before adding a Raspberry Pi as a device on the AWS IoT console, it needs to be setup with the necessary OS and other prerequisites. The official Raspberry Pi documentation details the steps to setup a Raspberry Pi in headless mode.
Installing the AWS IoT Device SDK in Raspberry Pi
Connect to the newly created Raspberry Pi via a SSH console (such as Putty or Terminal) or open a terminal via the GUI (if a desktop version was installed). Before installing the AWS IoT Device SDK and sample code, the required libraries and tools are needed to install the SDKs.
Update the operating system and install required libraries using the following commands:
sudo apt-get update
sudo apt-get upgrade
sudo apt-get install cmake
sudo apt-get install libssl-dev
The device will also need a version of git to install the AWS IoT Device SDK for JavaScript. A simple check using the following command will show if git is already installed.
git --version
If the above command returns any Git version, then Git is already installed and you can skip the next step. If there is an error, then install Git by running the following command:
sudo apt-get install git
Run the git –version command again to verify that Git is installed correctly.
Python 3.5 and later versions is needed for installing the SDK. A default setup of the Raspberry Pi using the Raspbian OS includes Python 3.7 by default. In the event, it is not installed or you are using a different Debian-based OS, install python and pip3 (python’s default package manager) using the following command:
sudo apt install python3
sudo apt install python3-pip
Verify the python and pip version by running,
python3 –version
pip3 –version
Use the following commands to install the AWS IoT SDK and the sample apps
cd ~
python3 -m pip install awsiotsdk
git clone https://github.com/AWS/AWS-iot-device-sdk-python-v2
Running the sample app
In this section we’ll see how the device and the IoT console interact with each other using the MQTT library to publish and subscribe messages in JSON format. The sample Application ‘pubsub’ subscribes to a topic – topic_1. It then publishes ten messages to that topic on the device and displays them as they’re received from the message broker (from the AWS IoT console to your device and vice versa).
For authenticating the device with the the AWS IoT platform the sample app needs certificate files.
Installing the device certificate files for the sample application
First create a certs folder in your home directory of your device by following the below command.
cd ~
mkdir certs
Inside the ~/certs directory, copy the previously downloaded private key, device certificate, and root CA certificate.
The file structure is as shown below,
- Root CA Certificate: ~/certs/Amazon-root-CA-1.pem
- Device certificate: ~/certs/device.pem.crt
- Private key: ~/certs/private.pem.key
To run the sample app, we also need an endpoint. This is listed in the Things section in the AWS IoT Console. In the AWS IoT console, choose Manage, and then choose Things. Choose the IoT thing created for your device, MyIotThing was the name used earlier, and then choose Interact. On the thing details page, the endpoint is displayed in the HTTPS section.
The endpoint is often in the format as below: endpoint_id-ats.iot.region.amazonaws.com.
Installing and running the sample application
Navigate to the sample app directory:
cd ~/aws-iot-device-sdk-python-v2/samples
Replace your-iot-endpoint as indicated In the command line window and run the following command:
python3 pubsub.py --topic topic_1 --root-ca ~/certs/Amazon-root-CA-1.pem --cert ~/certs/device.pem.crt --key ~/certs/private.pem.key --endpoint your-iot-endpoint
Observe the sample app. It connects to the AWS IoT service for your account and subscribes to the message topic, topic_1. It also displays the received messages on that topic. As you can see it publishes ten messages to the topic, topic_1. The following output is shown in the device terminal window.
Connecting to a3qEXAMPLEffp-ats.iot.us-west-2.amazonaws.com with client ID 'test-0c8ae2ff-cc87-49d2-a82a-ae7ba1d0ca5a'...
Connected!
Subscribing to topic 'topic_1'...
Subscribed with QoS.AT_LEAST_ONCE
Sending 10 message(s)
Publishing message to topic 'topic_1': Hello World! [1]
Received message from topic 'topic_1': b'Hello World! [1]'
Publishing message to topic 'topic_1': Hello World! [2]
Received message from topic 'topic_1': b'Hello World! [2]'
Publishing message to topic 'topic_1': Hello World! [3]
Received message from topic 'topic_1': b'Hello World! [3]'
Publishing message to topic 'topic_1': Hello World! [4]
Received message from topic 'topic_1': b'Hello World! [4]'
Publishing message to topic 'topic_1': Hello World! [5]
Received message from topic 'topic_1': b'Hello World! [5]'
Publishing message to topic 'topic_1': Hello World! [6]
Received message from topic 'topic_1': b'Hello World! [6]'
Publishing message to topic 'topic_1': Hello World! [7]
Received message from topic 'topic_1': b'Hello World! [7]'
Publishing message to topic 'topic_1': Hello World! [8]
Received message from topic 'topic_1': b'Hello World! [8]'
Publishing message to topic 'topic_1': Hello World! [9]
Received message from topic 'topic_1': b'Hello World! [9]'
Publishing message to topic 'topic_1': Hello World! [10]
Received message from topic 'topic_1': b'Hello World! [10]'
10 message(s) received.
Disconnecting...
Disconnected!
Viewing messages from the sample app in the AWS IoT console
The sample app’s message are visible in the AWS IoT console as they pass through the message broker using a MQTT client.
- In the left navigation of AWS IoT Console, Open the MQTT client
- Subscribe to the topic with name topic_1
- In your device command line window, run the sample app again and watch the messages in the MQTT client section of AWS IoT console.
cd ~/aws-iot-device-sdk-python-v2/samples
python3 pubsub.py --topic topic_1 --root-ca ~/certs/Amazon-root-CA-1.pem --cert ~/certs/device.pem.crt --key ~/certs/private.pem.key --endpoint your-iot-endpoint
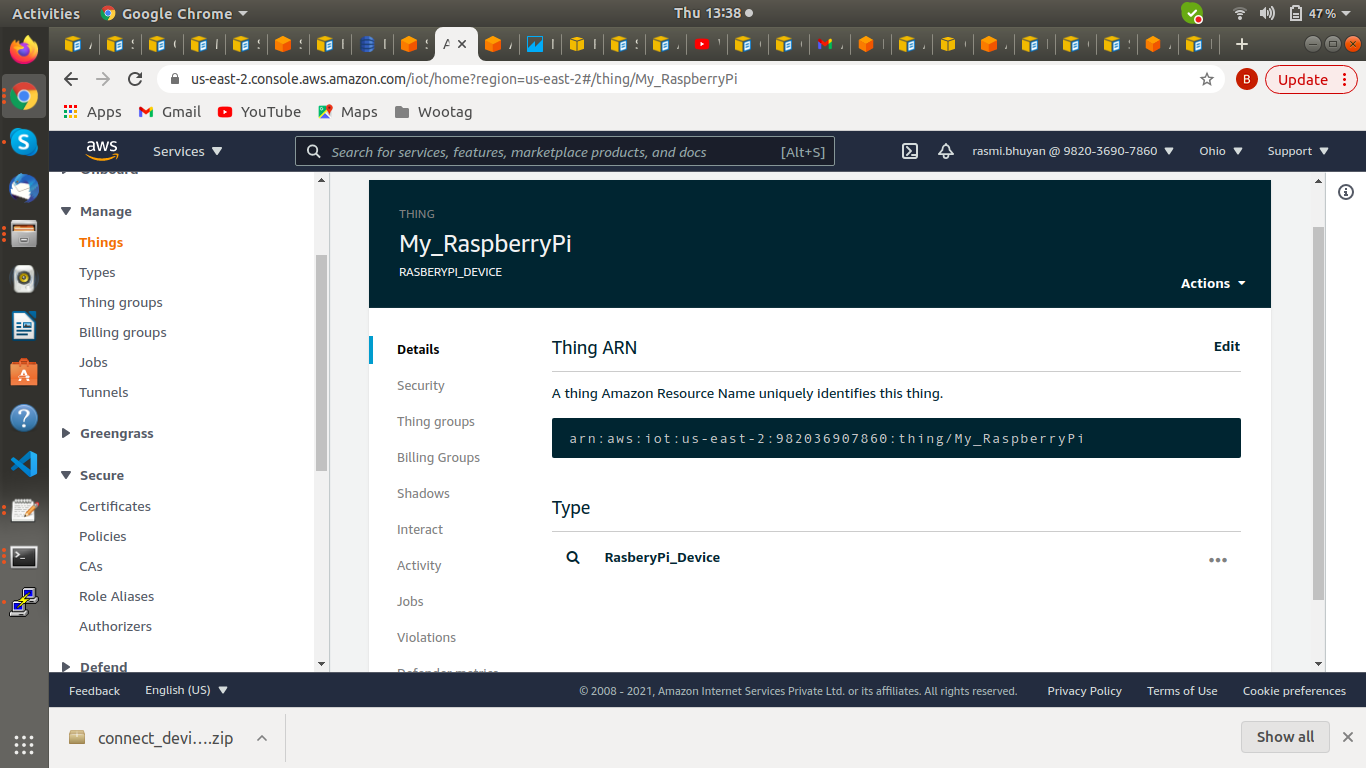
A new Thing created with the name My_RaspberryPi.
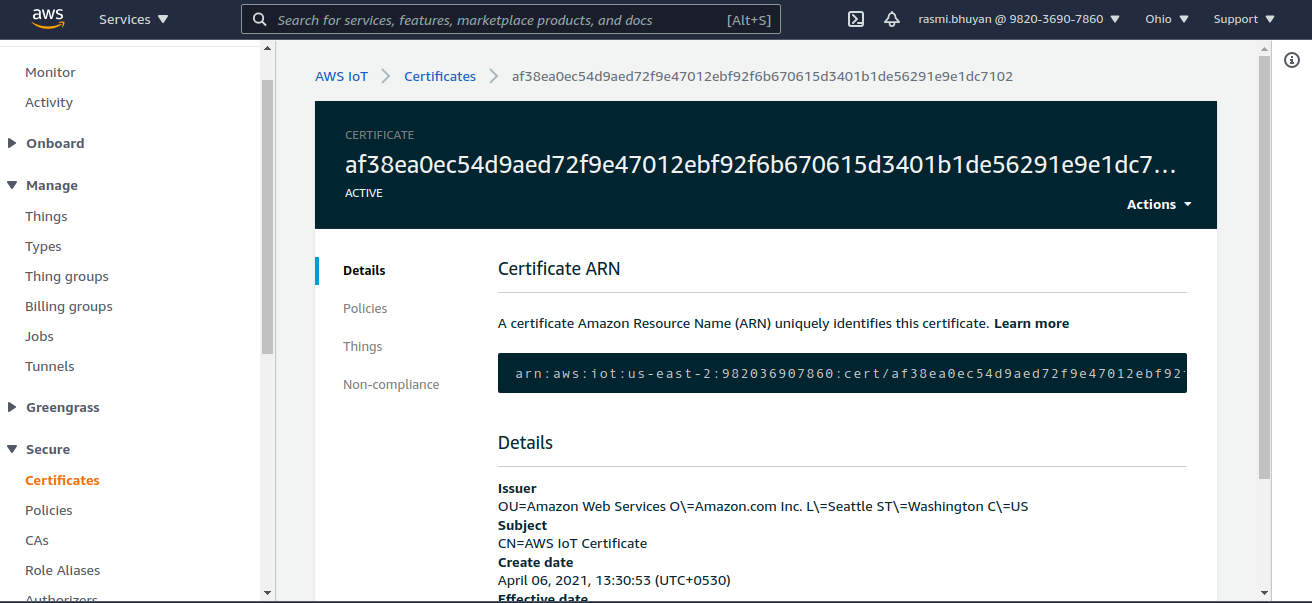
The authentication certificate is created.
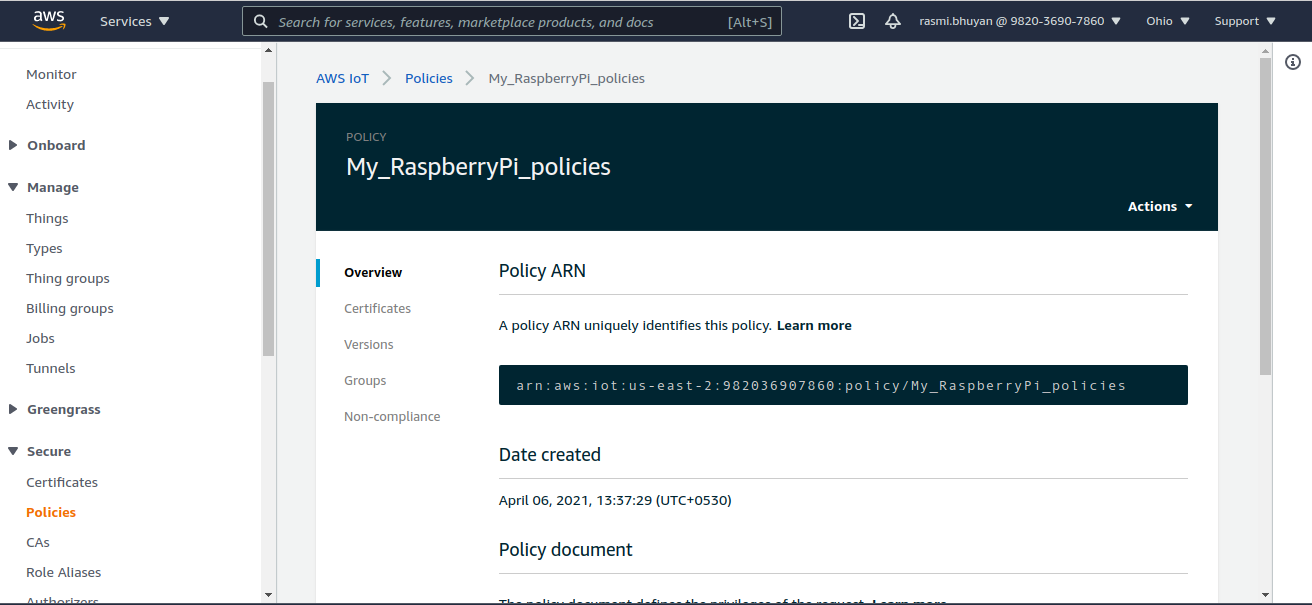
The authentication policies are created.
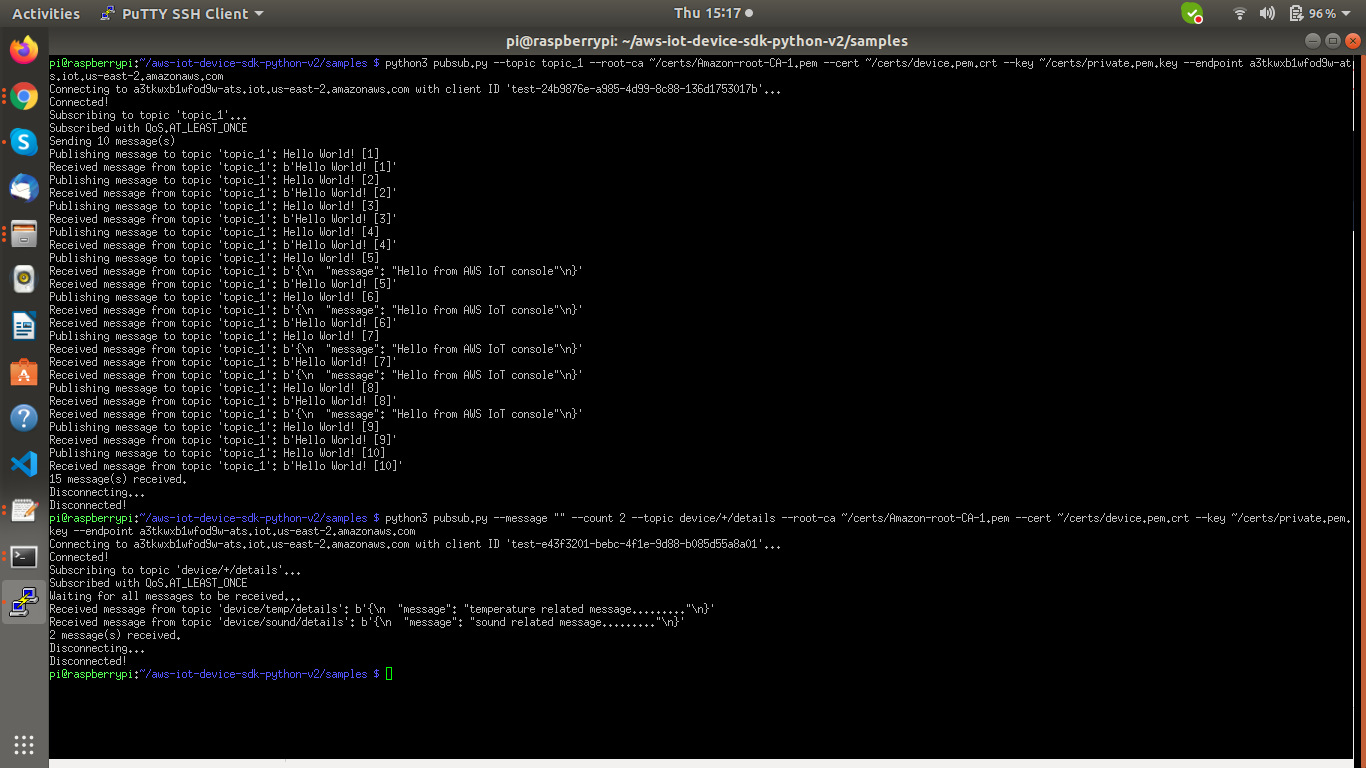
Data interaction between AWS IoT and the Raspberry Pi device.

Testing the data through MQTT protocol by sending them into JSON format.
In the next post, we’ll see how to store device data in a Dynamo DB based on a pre-configured IoT rule.

About the author
Rasmi Bhuyan
Rasmi has a Bachelor’s degree in Science and has been working with Excellarate (now Synerzip) for close to a year. He is an IoT enthusiast and has been tinkering with different platforms recently.