In this tutorial, we deep dive into setting cron jobs on AWS Lambda with CloudWatch events to make it Serverless.
Typical use case
Let’s look at the use case:
We need to fetch data from social networks and save it into the database/Elasticsearch. A similar use case could be to send an email every morning for a specific event.
I decided to use Claudia.js – a tool that automates the deployment of AWS Lambda and API Gateway configurations. AWS CLI was used to run the cron job on AWS Lambda with the Cloudwatch event.
Before we get to the task of creating the cron job, we need to create a Node.js app or service using Express. We then make this app or service Serverless and lastly, we need to attach the cron job to it.
The entire build is a three-part process:
- Build a Node.js application using the Express framework
- Make it Serverless by deploying AWS Lambda using Claudia
- Use AWS CLI to run the cron job on AWS Lambda with the CloudWatch event
Build Node.js application using the Express framework
Here is a step-by-step tutorial to create a “Hello world” application, using NodeJs and Express framework.
Create a folder with any name. Within that folder, create an index.js file with the following code snippet in it.
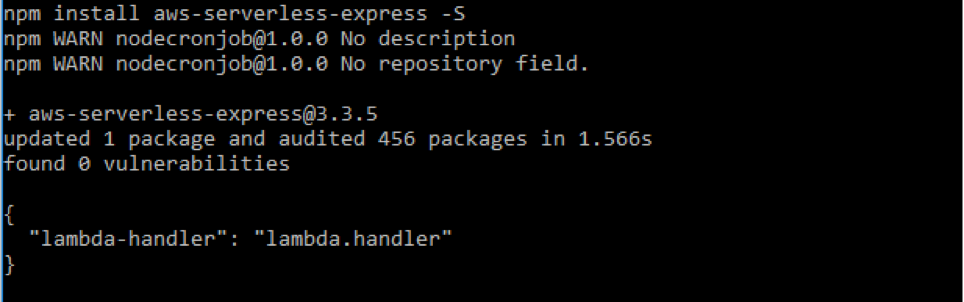
Run npm install express from your terminal to install the Express Web Framework.
Run node index.js and visit http://localhost:3000 in your browser. You should now see the “Hello world!” message.
Make it Serverless by deploying AWS Lambda using Claudia
This section focuses on deploying an existing Node.js app on AWS Lambda using Claudia. Click here for Claudia’s documentation. As is obvious, a Serverless API consists of AWS Lambda and Gateway.
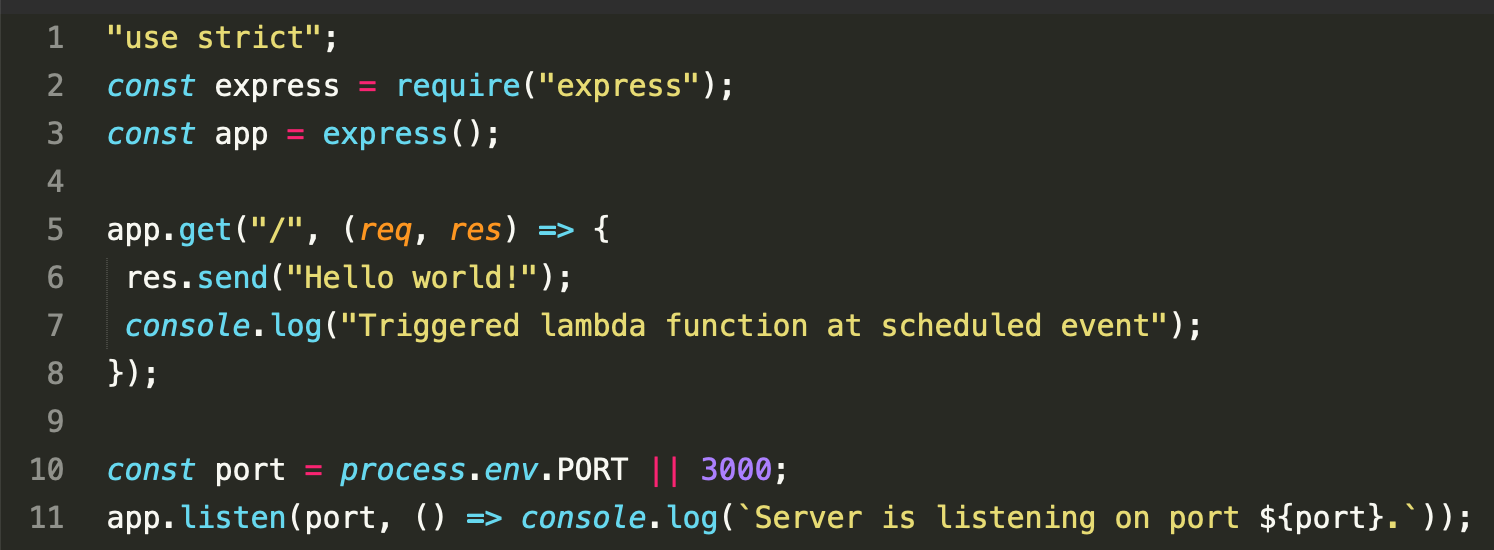
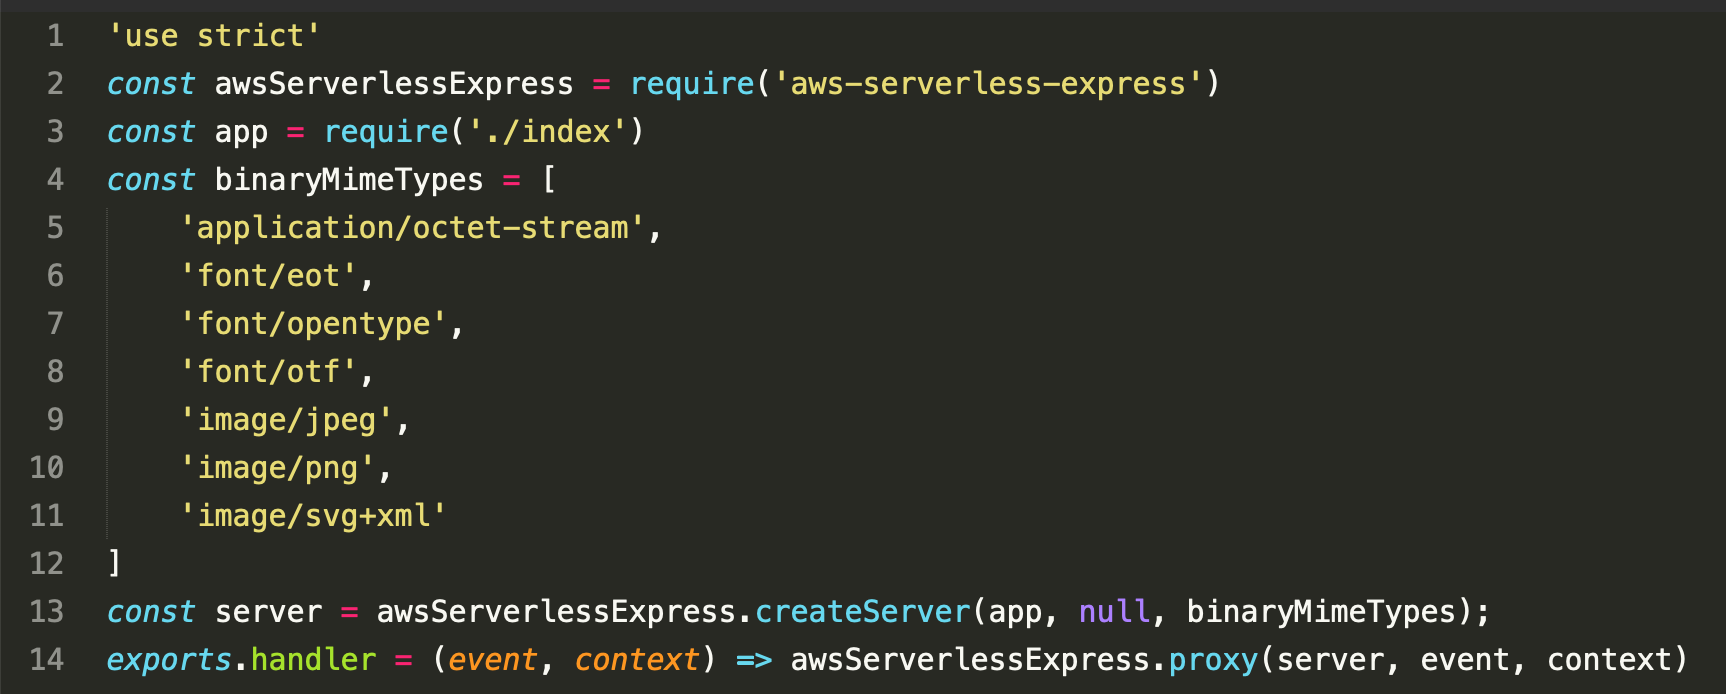
To deploy and make the existing Node.js “Hello World!” app into a Serverless API, we need to modify the current index.js file in such a way that it supports AWS Lambda and the deployment using Claudia.
Our modified index.js file is as follows:
Create a wrapper for AWS Lambda
Next, we generate a wrapper function to get the Node.js app working with AWS Lambda. This function already exists in Claudia and can be generated using this command:
claudia generate-serverless-express-proxy –express-module index
In the above command, index is the name of the entry file without the .js extension. You should see the following screen:
where,
- the ‘region’ parameter is used to specify the region where you wish to create your Lambda resource
- the ‘memory’ parameter is used to specify the memory in MB. Memory should be a multiple of 64, and the default memory is 128MB
- the ‘timeout’ parameter is used to indicate the function execution time, in seconds
This command shows the following output after sending your Node.js app to Lambda:

Hurray, this works! This completes our Serverless deployment on AWS. Now let’s move on to the last part of running cron jobs on AWS Lambda.
Use AWS CLI to run the cron job on AWS Lambda with the CloudWatch event
Let’s consider, the following use case:
The Lambda function fetches data from different social networks and updates the database. It needs to schedule the events at a specific time each day. The function also sends an email to all employees at 8.00 AM every day and a text message to all users once every week.
Before moving forward ensure that you have installed AWS CLI. Click here for more information on how to do this.
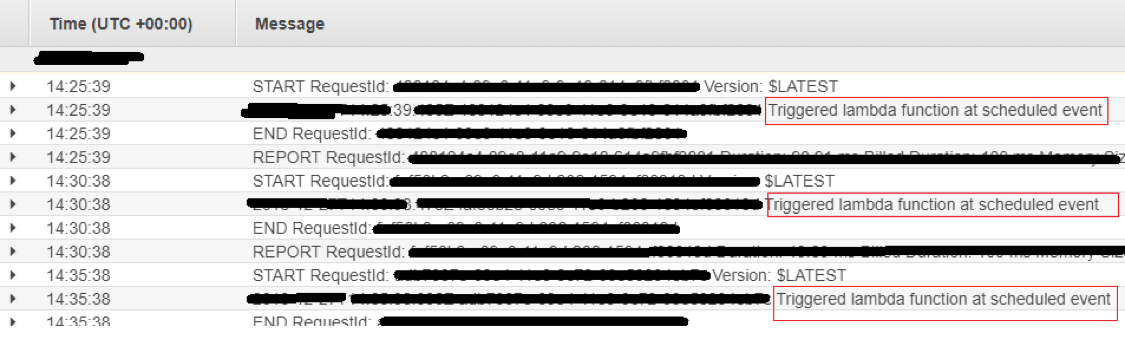
If you observe, the index.js file contains a console.log(“Triggered lambda function at scheduled event”) statement. This enables us to identify an event in the AWS log after triggering the cron job on it.
Follow these commands to run the cron job on the “Hello World!” Lambda function:
To run the cron job or schedule the event after every 5 minutes, enter the following command on your terminal.
aws events put-rule –name helloWorldRule –schedule-expression ‘cron(0/5 * * * ? *)’
where,
- the ‘name’ helloWorldRule – provides the name of the rule. This name can be set to anything and is up to the developer.
- the ‘schedule-expression’ ‘cron(0/5 * * * ? *)’ – this is a cron expression that will invoke every 5 minutes.
For more schedule expressions use this link.
The above command will show the following output:

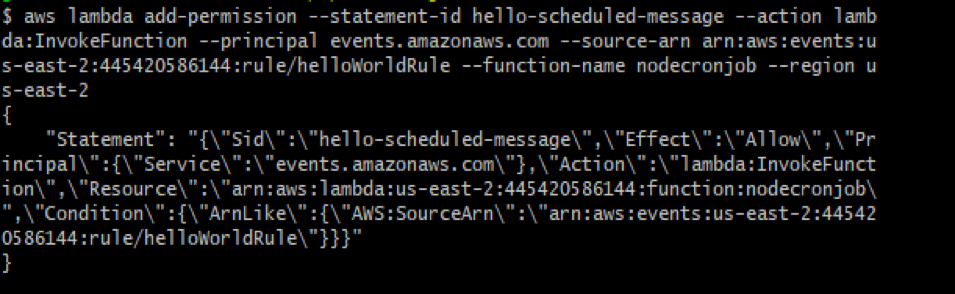
aws lambda add-permission –statement-id hello-scheduled-message –action lambda:InvokeFunction –principal events.amazonaws.com –source-arn arn:aws:events:us-east-2:445420586144:rule/helloWorldRule –function-name nodecronjob –region us-east-2
where,
- ‘statement-id’ – The hello-scheduled-message is the statement id
- ‘action’ – It is an action to invoke the Lambda function
- ‘source-arn’ – This is an Amazon Resource Name of the CloudWatch event rule received from the previous command
- ‘function-name’ – This is a function name that is available in the claudia.json file
- ‘region us-east-2’ – This is the region name also found from the claudia.json file
The above command provides the following JSON response:
aws events put-targets –rule helloWorldRule –targets “Id”=”1″,”Arn”=”arn:aws:lambda:us-east-2:445420586144:function:nodecronjob”
Here, ‘ARN’ is the value from the previous command. This command shows the following output:

There are several ways to make Node.js + Express applications Serverless. However, I have tried to explain a way where results can be achieved in minimal time and commands for creating and invoking the function and deployment.