In the first part of this series we covered the basics of Angular Formly. Here we delve deeper and reveal more concepts.
Layouts in Formly
Layouts from the Formly library helps us design responsive forms with modern aesthetics.
We have to use the fieldGroupClassName property in the configuration and have to assign the class name. Then in the fieldGroup we need to add one more property – className (the name of the class can be anything, but should pass naming conventions)
formFields = [
{
fieldGroupClassName: 'display-flex'
fieldGroup: [
{
  className: 'flex-1',
  type: 'input',
  templateOptions: {
     label: 'Workset Name'
   }
},
{
  className: 'flex-1',
  type: 'select',
  templateOptions: {
     label: 'Workflow',
     options:     [{ id: 1, name: 'Workflow 1'}]
  }
},
{
  className: 'flex-1',
  type: 'select',
  templateOptions: {
     label: 'Process',
     options:     [{ id: 1, name: 'Process 1'}]
   }
}
......]
}
] as FormlyFieldConfig[]
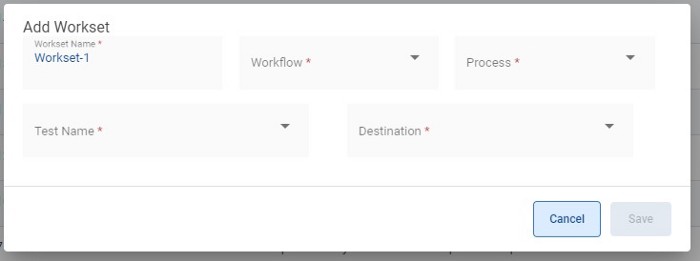
Layout with flexbox
Without wrapper classes, all the fields will display one below the other.
Custom Templates
As stated in part 1, Formly supports several pre-built templates. However, we can also create custom templates as well.
First you must create a component representing the field which extends the FieldType class.
import { Component } from '@angular/core';
import { FieldType } from '@ngx-formly/core';

@Component({
selector: 'formly-custom-template-input-field',
template: `
  <input type="input" [formControl]="formControl" [formlyAttributes]="field">
`,
})
export class FormlyCustomTemplateInputField extends FieldType {}
Then register the custom type in the NgModule declaration:
FormlyModule.forRoot({
 types: [
   { name: 'input', component: FormlyFieldInput },
 ],
}),
types allows you to specify a custom type which you can use in your field configuration and requires two properties:
- name: The name of the template
- component: The component that Formly should create when this type is set
Use the newly created custom type in the form config:
fields: FormlyFieldConfig[] = [
  {
    key: 'firstname',
    type: 'input',
  },
];
Building nested forms in Formly
There are situations where we need nested forms. To do this simply add the following extra properties in the field configurations,
wrappers: ['panel'],
templateOptions: { label: 'Address' },
fieldGroup: [{   }]
Where, wrapper is a panel. Under templateOptions we have to give a label name to display the name on the panel. The last property is fieldGroup where we can add as many fields in it.
Hooks
In order to customise the behaviour of our form control at run time Formly contains a concept called hooks. These are of type “FormlyLifeCycleOptions” under which they provide the following life cycles:
- OnInit
- OnChanges
- doCheck
- afterContentInit
- afterContentChecked
- afterViewInit
- afterViewChecked
- onDestroy
Here is an example of these life cycle hooks,
key: 'FirstName',
hooks: {
      onInit: (field: FormlyFormField) {
          field.templateOptions.lable = 'Enter The First Name'
      }
}
We initialise the field label as “FirstName” however when our form renders in the view, at runtime we will display the label as “Enter The First Name”. The label which we have initialized will no longer display in the view. Consequently, this means that we can control any field’s label and value using hooks. Operations using “RxJs” are also possible in Formly.
key: 'cityId',
options: []
hooks: {
      onInit: (field: FormlyFormField) {
          field.templateOptions.options = field.form.get('stateId').valueChanges.pipe(switchMap(nationId => this.serviceName.getCities(stateId))
     )
  }
}
Here we assume that we have a list of states and based on selected stateId we will filter the cities from the states. We can directly associate the filtered cities to the options array.
Conclusion
The Formly library helps rapidly build forms with custom validation, use services for fetching results using an API, runtime changes and more.